Note
Go to the end to download the full example code
SDF Impostors on Billboards#
Traditional rendering engines discretize surfaces using triangles or quadrilateral polygons. The visual quality of these elements depends on the number of polygons used to build the 3D mesh, i.e., a smoother surface will require more polygons. However, increasing the amount of rendered polygons comes at the cost of performance as it decreases the number of frames per second (FPS), which might compromise the real-time interactivity of a visualization.
Billboarding is a technique that changes an object’s orientation to always face a specific direction, in most cases, the camera. This technique became popular in games and applications with a high polygonal quota requirement.
Signed Distance Functions (SDFs) are mathematical functions that take as input a point in a metric space and return the distance from that point to the boundary of the function. Depending on whether the point is contained within this boundary or outside it, the function will return negative or positive values [Hart1996]. For visualization purposes, the task is to display only the points within the boundary or, in other words, those whose distance to the border is either negative or positive, depending on the definition of the SDF.
This tutorial exemplifies why FURY’s billboard actor is a suitable rendering option when thinking about performance and how it can be used to create impostors using SDFs.
Let’s start by importing the necessary modules:
import os

import fury
import numpy as np
from fury.shaders import compose_shader, import_fury_shader
from fury.utils import represent_actor_as_wireframe
Now set up a new scene to place our actors in.
scene = fury.window.Scene()
This tutorial is divided into two parts. First, we will render spheres in the traditional way and then render them using SDFs on billboards.
Traditional sphere rendering#
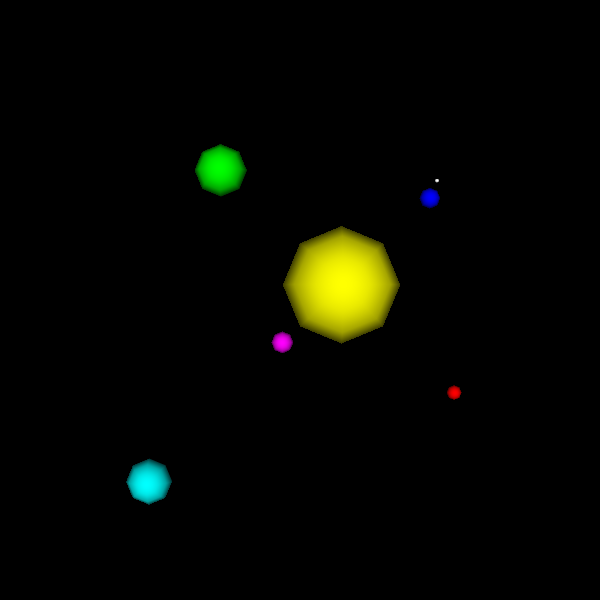
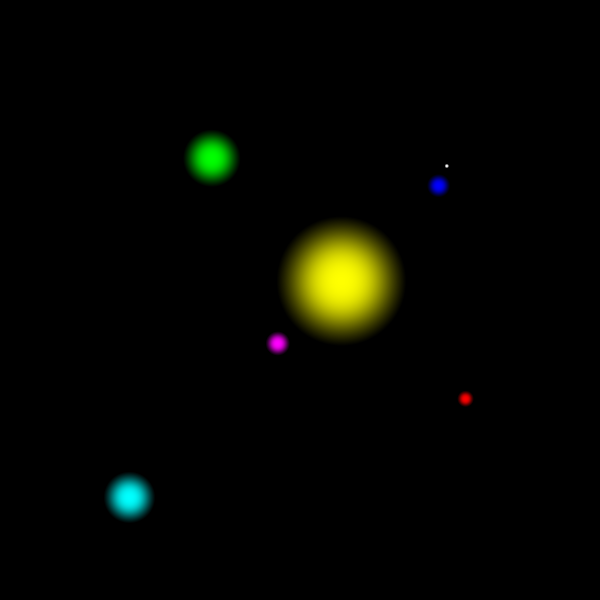
FURY provides an easy way to create sphere glyphs from numpy arrays as follows:
centers = np.array(
    [
        [0, 0, 0],
        [-6, -6, -6],
        [8, 8, 8],
        [8.5, 9.5, 9.5],
        [10, -10, 10],
        [-13, 13, -13],
        [-17, -17, 17],
    ]
)
colors = np.array(
    [[1, 1, 0], [1, 0, 1], [0, 0, 1], [1, 1, 1], [1, 0, 0], [0, 1, 0], [0, 1, 1]]
)
scales = np.array([6, 1.2, 1, 0.2, 0.7, 3, 2])
spheres_actor = fury.actor.sphere(
    centers, colors, radii=scales, phi=8, theta=8, use_primitive=False
)
To interactively visualize the recently created actors, we only need to add them to the previously created scene and set the following variable to True, otherwise, we will screenshot the scene.
scene.add(spheres_actor)

interactive = False

if interactive:
    fury.window.show(scene)
else:
    fury.window.record(scene=scene, size=(600, 600), out_path="viz_regular_spheres.png")
Now, let’s explore our scene to understand what we have created. Traditional FURY spheres are designed using a set of interconnected triangles. To visualize them, we want to transform our representation from Surface to Wireframe using the following command.
represent_actor_as_wireframe(spheres_actor)

if interactive:
    fury.window.show(scene)
else:
    fury.window.record(
        scene=scene, size=(600, 600), out_path="viz_low_res_wireframe.png"
    )

Let’s clean the scene and play with the parameters phi and theta.
scene.clear()
spheres_actor = fury.actor.sphere(
    centers, colors, radii=scales, phi=16, theta=16, use_primitive=False
)
represent_actor_as_wireframe(spheres_actor)
scene.add(spheres_actor)

if interactive:
    fury.window.show(scene)
else:
    fury.window.record(
        scene=scene, size=(600, 600), out_path="viz_hi_res_wireframe.png"
    )
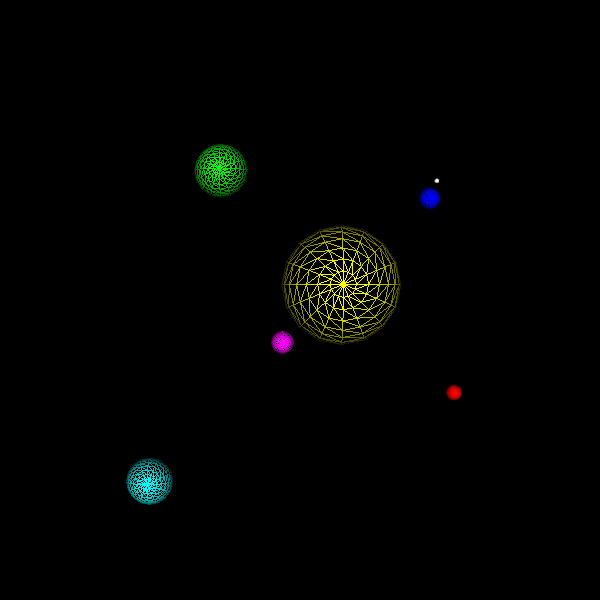
As you might have noticed, these parameters control the resolution of the spheres. Evidently, these parameters directly impact the quality of the visualization, but increasing such resolution comes at the cost of performance, i.e., more computing power will be needed and drawn to interact with these actors.
Luckily for us, a technique delivers high-resolution glyphs at a much lower cost. This technique is known as Signed Distance Functions (SDFs), and they work as follows:
SDF sphere rendering#
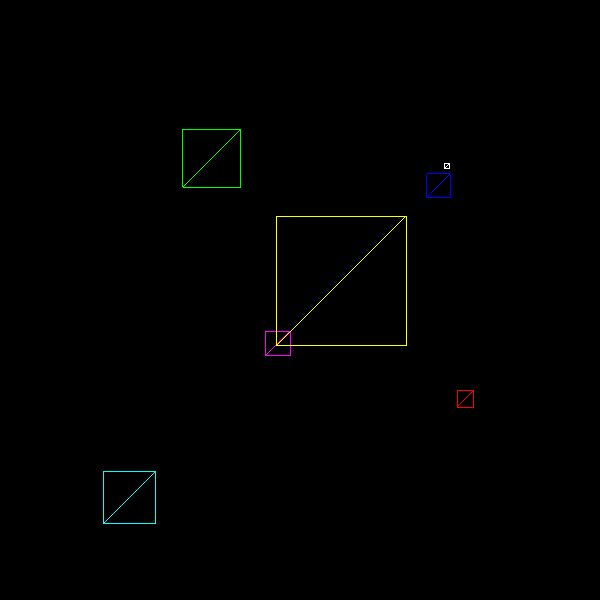
It is possible to render SDFs in FURY by using the following configuration, but first, let’s clear the scene.
scene.clear()
The billboard actor is suited and continuously improved to render SDFs. To create and visualize it, we can use the following instructions:
If you interacted with this actor, you might have noticed how it always aligned itself to the camera or, in other words, your FURY window. Now that we know how billboards work, we can start working on our Signed Distance Spheres. Let’s clear our scene first.
scene.clear()
FURY already includes a shader function with the definition of a Signed Distance Sphere. So we can load it and use it like this:
sd_sphere = import_fury_shader(os.path.join("sdf", "sd_sphere.frag"))
Additionally, we need to define the radii of our spheres. Since we prefer these to be determined by the billboards’ size, we will use the maximum radius distance allowed by our billboards.
sphere_radius = "const float RADIUS = 1.;"
Let’s calculate the distance to the sphere by combining the previously defined variables.
sphere_dist = "float dist = sdSphere(point, RADIUS);"
Now, evaluate the signed distance function.
sdf_eval = """
    if (dist < 0)
        fragOutput0 = vec4(color, opacity);
    else
        discard;
    """
Putting all of our declarations (constants and function) and implementations (distance calculation and evaluation) together.
fs_dec = compose_shader([sphere_radius, sd_sphere])
fs_impl = compose_shader([sphere_dist, sdf_eval])
We are ready to create and visualize our SDF-billboard actors.
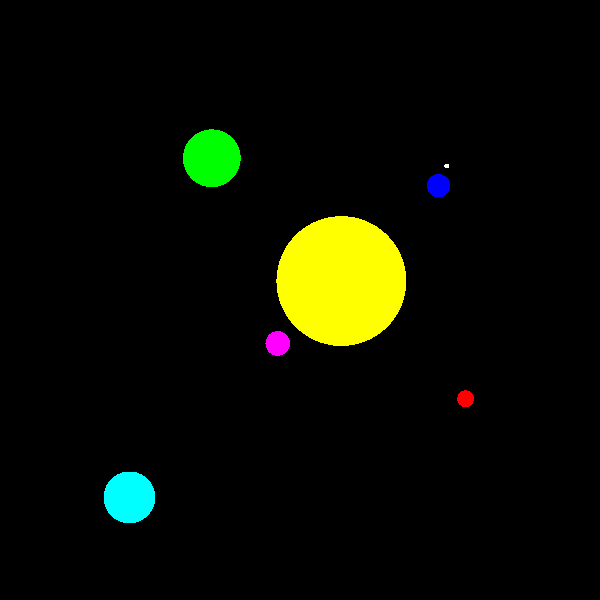
Hold on, those actors don’t look exactly like the ones we created using traditional techniques; they don’t even look 3D but 2D. Well, that’s because we still need an essential component: shading. So let’s clear our scene and add shading to our SDF billboard actors.
scene.clear()
The first thing necessary to add shading to our SDF-billboard actors is to calculate the normals of the SDFs. In this tutorial we are not going to get into detail in the gradient and derivatives of SDFs, so we will use the central differences technique implemented in the following FURY shader function:
central_diffs_normal = import_fury_shader(os.path.join("sdf", "central_diffs.frag"))
To use the central differences technique, we need to define a map function that wraps our SDF and evaluates only a point.
sd_sphere_normal = """
    float map(vec3 p)
    {
        return sdSphere(p, RADIUS);
    }
    """
Then we can load the Blinn-Phong illumination model.
blinn_phong_model = import_fury_shader(
    os.path.join("lighting", "blinn_phong_model.frag")
)
Again, let’s bring all of our declarations (constants and functions) together.
fs_dec = compose_shader(
    [
        sphere_radius,
        sd_sphere,
        sd_sphere_normal,
        central_diffs_normal,
        blinn_phong_model,
    ]
)
Now, we can start our fragment shader implementation with the signed distance function evaluation. You might notice that in this case, we are not using an if statement but a step function, which is a more efficient way to perform this evaluation. You can also replace the step function with a smoothstep operation and, in that way, add a very efficient form of antialiasing.
sdf_eval = "opacity *= 1 - step(0, dist);"
In this case, we also need the absolute value of the distance to compensate for the depth of the SDF sphere.
abs_dist = "float absDist = abs(dist);"
We are ready to calculate the normals.
normal = "vec3 normal = centralDiffsNormals(vec3(point.xy, absDist), .0001);"
With the normals we can calculate a light attenuation factor.
light_attenuation = "float lightAttenuation = normal.z;"
Now, we are ready to calculate the color and output it.
color = """
    color = blinnPhongIllumModel(
        lightAttenuation, lightColor0, diffuseColor, specularPower,
        specularColor, ambientColor);
    """

frag_output = "fragOutput0 = vec4(color, opacity);"
As before, we can bring our implementation code together.
fs_impl = compose_shader(
    [sphere_dist, sdf_eval, abs_dist, normal, light_attenuation, color, frag_output]
)
Finally, recreate the SDF billboard actors and visualize them.
References#
Total running time of the script: (0 minutes 0.320 seconds)