Note
Go to the end to download the full example code
Using Layouts with different UI elements#
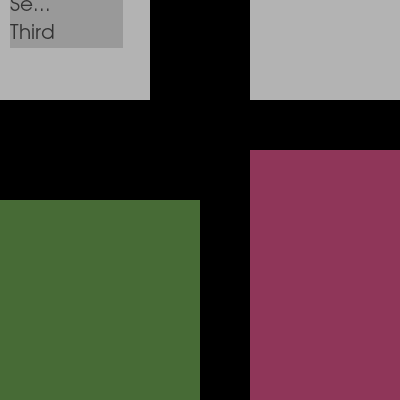
This example shows how to place different UI elements in different Layouts. The Layouts used here is GridLayout (with different cell shapes).
First, let’s import fury.
import fury
We create some panels and then we arrange them in a grid fashion
First, we create some panels with different sizes/positions
panel_1 = fury.ui.Panel2D(size=(200, 200), color=(0.4, 0.6, 0.3), position=(100, 100))

panel_2 = fury.ui.Panel2D(size=(250, 250), color=(0.8, 0.3, 0.5), position=(150, 150))
Now we create two listboxes
listbox_1 = fury.ui.ListBox2D(size=(150, 150), values=["First", "Second", "Third"])

listbox_2 = fury.ui.ListBox2D(size=(250, 250), values=["First", "Second", "Third"])
Now we create two different UI i.e. a slider and a listbox
slider = fury.ui.LineSlider2D(length=150)
listbox = fury.ui.ListBox2D(size=(150, 150), values=["First", "Second", "Third"])
Now, we create grids with different shapes
rect_grid = fury.layout.GridLayout(position_offset=(0, 0, 0))
square_grid = fury.layout.GridLayout(cell_shape="square", position_offset=(0, 300, 0))
diagonal_grid = fury.layout.GridLayout(
    cell_shape="diagonal", position_offset=(0, 600, 0)
)
Applying the grid to the ui elements
rect_grid.apply([panel_1, panel_2])
square_grid.apply([listbox_1, listbox_2])
diagonal_grid.apply([slider, listbox])

current_size = (1500, 1500)
show_manager = fury.window.ShowManager(size=current_size, title="FURY UI Layout")

show_manager.scene.add(panel_1, panel_2, listbox_1, listbox_2, slider, listbox)

# To interact with the UI, set interactive = True
interactive = False

if interactive:
    show_manager.start()

fury.window.record(scene=show_manager.scene, out_path="ui_layout.png", size=(400, 400))

Total running time of the script: (0 minutes 0.073 seconds)
