Note
Go to the end to download the full example code
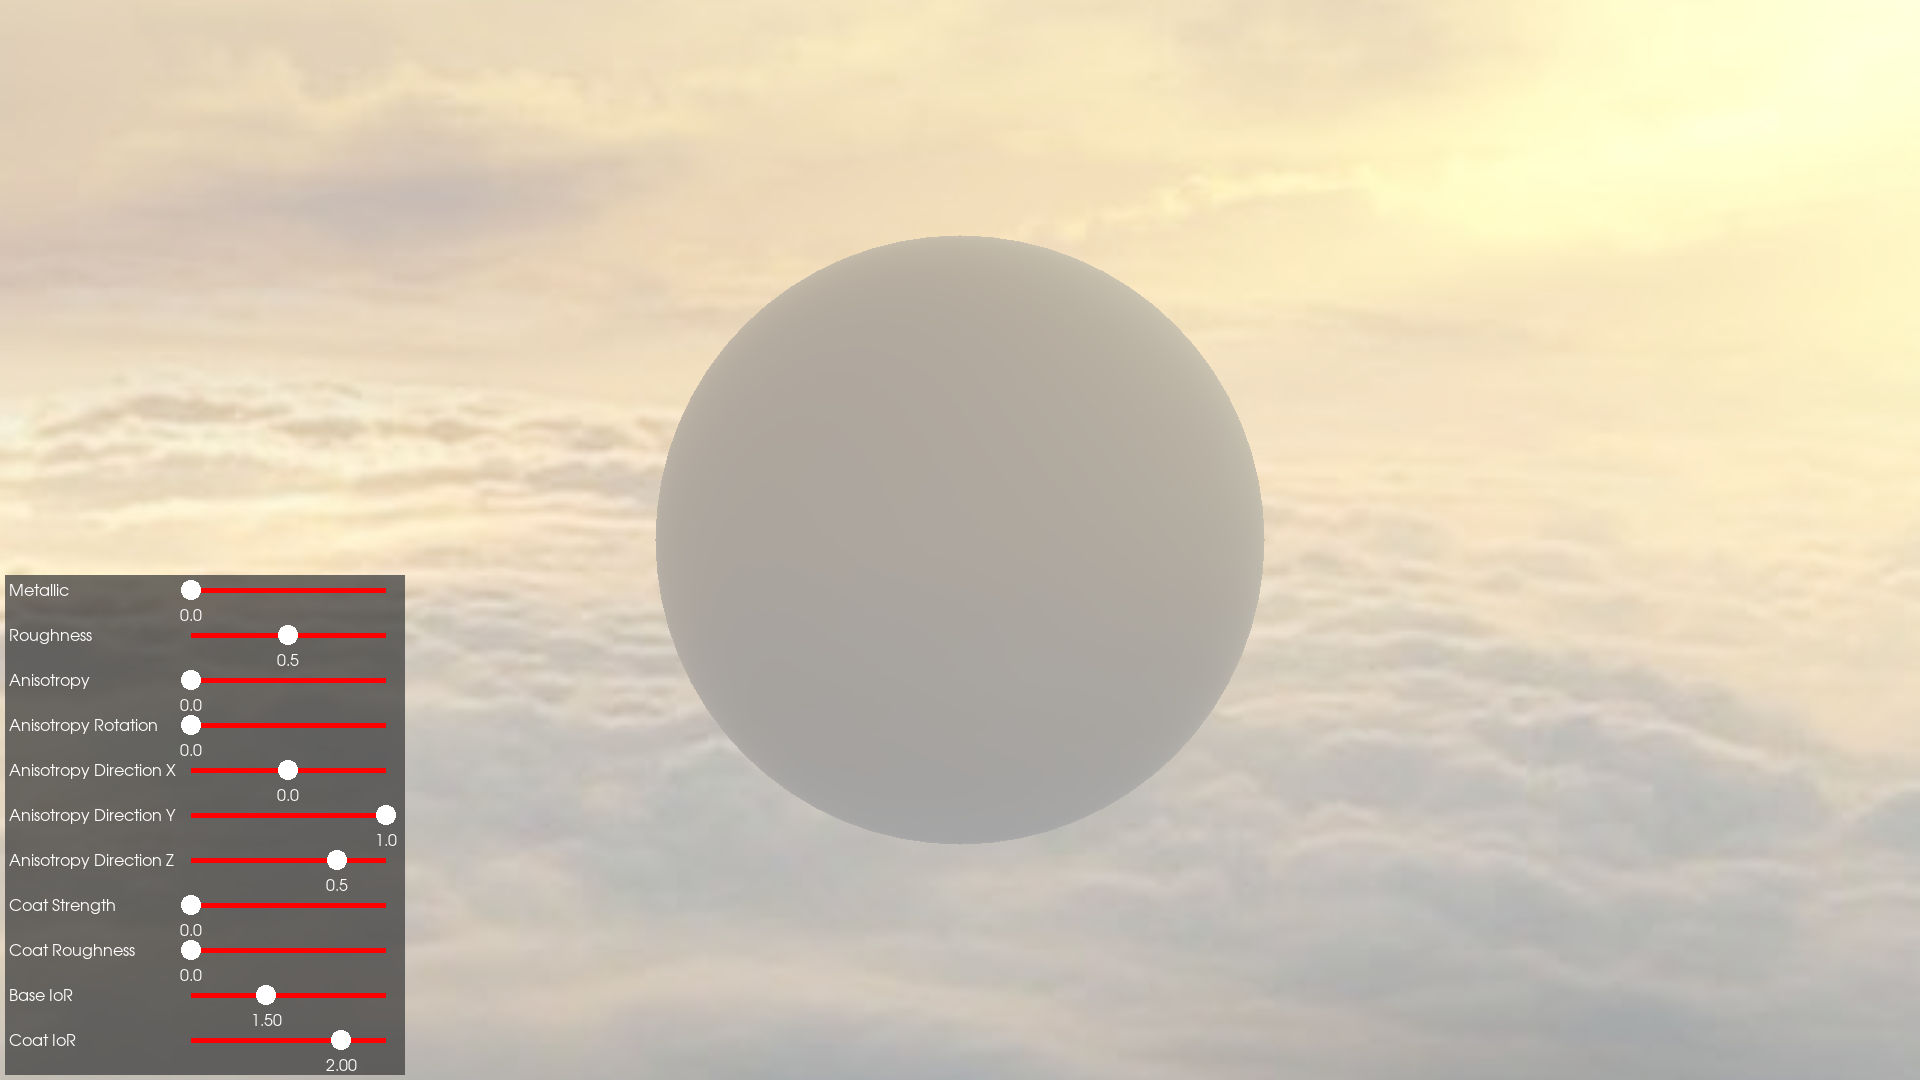
Interactive PBR demo#
This is a demonstration of how Physically-Based Rendering (PBR) can be used to simulate different materials.
Let’s start by importing the necessary modules:
import fury
The following functions will help us to manage the sliders events.
def change_slice_metallic(slider):
    global pbr_params
    pbr_params.metallic = slider.value


def change_slice_roughness(slider):
    global pbr_params
    pbr_params.roughness = slider.value


def change_slice_anisotropy(slider):
    global pbr_params
    pbr_params.anisotropy = slider.value


def change_slice_anisotropy_direction_x(slider):
    global doa, normals, sphere
    doa[0] = slider.value
    tangents = fury.utils.tangents_from_direction_of_anisotropy(normals, doa)
    fury.utils.tangents_to_actor(sphere, tangents)


def change_slice_anisotropy_direction_y(slider):
    global doa, normals, sphere
    doa[1] = slider.value
    tangents = fury.utils.tangents_from_direction_of_anisotropy(normals, doa)
    fury.utils.tangents_to_actor(sphere, tangents)


def change_slice_anisotropy_direction_z(slider):
    global doa, normals, sphere
    doa[2] = slider.value
    tangents = fury.utils.tangents_from_direction_of_anisotropy(normals, doa)
    fury.utils.tangents_to_actor(sphere, tangents)


def change_slice_anisotropy_rotation(slider):
    global pbr_params
    pbr_params.anisotropy_rotation = slider.value


def change_slice_coat_strength(slider):
    global pbr_params
    pbr_params.coat_strength = slider.value


def change_slice_coat_roughness(slider):
    global pbr_params
    pbr_params.coat_roughness = slider.value


def change_slice_base_ior(slider):
    global pbr_params
    pbr_params.base_ior = slider.value


def change_slice_coat_ior(slider):
    global pbr_params
    pbr_params.coat_ior = slider.value
Last, but not least, we define the following function to help us to reposition the UI elements every time we resize the window.
Let’s fetch a skybox texture from the FURY data repository.
fury.data.fetch_viz_cubemaps()
Dataset is already in place. If you want to fetch it again please first remove the folder /Users/skoudoro/.fury/cubemaps

({'skybox-nx.jpg': ('https://raw.githubusercontent.com/fury-gl/fury-data/master/cubemaps/skybox-nx.jpg', '12B1CE6C91AA3AAF258A8A5944DF739A6C1CC76E89D4D7119D1F795A30FC1BF2'), 'skybox-ny.jpg': ('https://raw.githubusercontent.com/fury-gl/fury-data/master/cubemaps/skybox-ny.jpg', 'E18FE2206B63D3DF2C879F5E0B9937A61D99734B6C43AC288226C58D2418D23E'), 'skybox-nz.jpg': ('https://raw.githubusercontent.com/fury-gl/fury-data/master/cubemaps/skybox-nz.jpg', '00DDDD1B715D5877AF2A74C014FF6E47891F07435B471D213CD0673A8C47F2B2'), 'skybox-px.jpg': ('https://raw.githubusercontent.com/fury-gl/fury-data/master/cubemaps/skybox-px.jpg', 'BF20ACD6817C9E7073E485BBE2D2CE56DACFF73C021C2B613BA072BA2DF2B754'), 'skybox-py.jpg': ('https://raw.githubusercontent.com/fury-gl/fury-data/master/cubemaps/skybox-py.jpg', '16F0D692AF0B80E46929D8D8A7E596123C76729CC5EB7DFD1C9184B115DD143A'), 'skybox-pz.jpg': ('https://raw.githubusercontent.com/fury-gl/fury-data/master/cubemaps/skybox-pz.jpg', 'B850B5E882889DF26BE9289D7C25BA30524B37E56BC2075B968A83197AD977F3')}, '/Users/skoudoro/.fury/cubemaps')
The following function returns the full path of the 6 images composing the skybox.
textures = fury.data.read_viz_cubemap("skybox")
Now that we have the location of the textures, let’s load them and create a Cube Map Texture object.
cubemap = fury.io.load_cubemap_texture(textures)
The Scene object in FURY can handle cube map textures and extract light
information from them, so it can be used to create more plausible materials
interactions. The skybox parameter takes as input a cube map texture and
performs the previously described process.
scene = fury.window.Scene(skybox=cubemap)
With the scene created, we can then populate it. In this demo we will only add a sphere actor.
sphere = fury.actor.sphere([[0, 0, 0]], (0.7, 0.7, 0.7), radii=2, theta=64, phi=64)
The direction of anisotropy (DoA) defines the direction at which all the tangents of our actor are pointing.
doa = [0, 1, 0.5]
The following process gets the normals of the actor and computes the tangents that are aligned to the provided DoA. Then it registers those tangents to the fury.actor.
<vtkmodules.vtkRenderingOpenGL2.vtkOpenGLActor(0x12f348300) at 0x2c0901fc0>
With the tangents computed and in place, we have all the elements needed to add some material properties to the actor.
pbr_params = fury.material.manifest_pbr(sphere)
Our actor is now ready to be added to the scene.
scene.add(sphere)
Let’s setup now the window and the UI.
show_m = fury.window.ShowManager(
    scene=scene, size=(1920, 1080), reset_camera=False, order_transparent=True
)
We will create one single panel with all of our labels and sliders.
control_panel = fury.ui.Panel2D(
    (400, 500), position=(5, 5), color=(0.25, 0.25, 0.25), opacity=0.75, align="right"
)
By using our previously defined function, we can easily create all the labels we need for this demo. And then add them to the panel.
slider_label_metallic = fury.ui.TextBlock2D(text="Metallic", font_size=16)
slider_label_roughness = fury.ui.TextBlock2D(text="Roughness", font_size=16)
slider_label_anisotropy = fury.ui.TextBlock2D(text="Anisotropy", font_size=16)
slider_label_anisotropy_rotation = fury.ui.TextBlock2D(
    text="Anisotropy Rotation", font_size=16
)
slider_label_anisotropy_direction_x = fury.ui.TextBlock2D(
    text="Anisotropy Direction X", font_size=16
)
slider_label_anisotropy_direction_y = fury.ui.TextBlock2D(
    text="Anisotropy Direction Y", font_size=16
)
slider_label_anisotropy_direction_z = fury.ui.TextBlock2D(
    text="Anisotropy Direction Z", font_size=16
)
slider_label_coat_strength = fury.ui.TextBlock2D(text="Coat Strength", font_size=16)
slider_label_coat_roughness = fury.ui.TextBlock2D(text="Coat Roughness", font_size=16)
slider_label_base_ior = fury.ui.TextBlock2D(text="Base IoR", font_size=16)
slider_label_coat_ior = fury.ui.TextBlock2D(text="Coat IoR", font_size=16)

control_panel.add_element(slider_label_metallic, (0.01, 0.95))
control_panel.add_element(slider_label_roughness, (0.01, 0.86))
control_panel.add_element(slider_label_anisotropy, (0.01, 0.77))
control_panel.add_element(slider_label_anisotropy_rotation, (0.01, 0.68))
control_panel.add_element(slider_label_anisotropy_direction_x, (0.01, 0.59))
control_panel.add_element(slider_label_anisotropy_direction_y, (0.01, 0.5))
control_panel.add_element(slider_label_anisotropy_direction_z, (0.01, 0.41))
control_panel.add_element(slider_label_coat_strength, (0.01, 0.32))
control_panel.add_element(slider_label_coat_roughness, (0.01, 0.23))
control_panel.add_element(slider_label_base_ior, (0.01, 0.14))
control_panel.add_element(slider_label_coat_ior, (0.01, 0.05))
Our sliders are created and added to the panel in the following way.
slider_slice_metallic = fury.ui.LineSlider2D(
    initial_value=pbr_params.metallic,
    max_value=1,
    length=195,
    text_template="{value:.1f}",
)
slider_slice_roughness = fury.ui.LineSlider2D(
    initial_value=pbr_params.roughness,
    max_value=1,
    length=195,
    text_template="{value:.1f}",
)
slider_slice_anisotropy = fury.ui.LineSlider2D(
    initial_value=pbr_params.anisotropy,
    max_value=1,
    length=195,
    text_template="{value:.1f}",
)
slider_slice_anisotropy_rotation = fury.ui.LineSlider2D(
    initial_value=pbr_params.anisotropy_rotation,
    max_value=1,
    length=195,
    text_template="{value:.1f}",
)
slider_slice_coat_strength = fury.ui.LineSlider2D(
    initial_value=pbr_params.coat_strength,
    max_value=1,
    length=195,
    text_template="{value:.1f}",
)
slider_slice_coat_roughness = fury.ui.LineSlider2D(
    initial_value=pbr_params.coat_roughness,
    max_value=1,
    length=195,
    text_template="{value:.1f}",
)
Notice that we are defining a range of [-1, 1] for the DoA. This is because within that range we cover all the possible 3D directions needed to align the tangents.
slider_slice_anisotropy_direction_x = fury.ui.LineSlider2D(
    initial_value=doa[0],
    min_value=-1,
    max_value=1,
    length=195,
    text_template="{value:.1f}",
)
slider_slice_anisotropy_direction_y = fury.ui.LineSlider2D(
    initial_value=doa[1],
    min_value=-1,
    max_value=1,
    length=195,
    text_template="{value:.1f}",
)
slider_slice_anisotropy_direction_z = fury.ui.LineSlider2D(
    initial_value=doa[2],
    min_value=-1,
    max_value=1,
    length=195,
    text_template="{value:.1f}",
)
Another special case are the Index of Refraction (IoR) sliders. In these cases, the values are defined in the range [1, 2.3] according to the documentation of the material.
slider_slice_base_ior = fury.ui.LineSlider2D(
    initial_value=pbr_params.base_ior,
    min_value=1,
    max_value=2.3,
    length=195,
    text_template="{value:.02f}",
)
slider_slice_coat_ior = fury.ui.LineSlider2D(
    initial_value=pbr_params.coat_ior,
    min_value=1,
    max_value=2.3,
    length=195,
    text_template="{value:.02f}",
)
Let’s add the event handlers functions to the corresponding sliders.
slider_slice_metallic.on_change = change_slice_metallic
slider_slice_roughness.on_change = change_slice_roughness
slider_slice_anisotropy.on_change = change_slice_anisotropy
slider_slice_anisotropy_rotation.on_change = change_slice_anisotropy_rotation
slider_slice_anisotropy_direction_x.on_change = change_slice_anisotropy_direction_x
slider_slice_anisotropy_direction_y.on_change = change_slice_anisotropy_direction_y
slider_slice_anisotropy_direction_z.on_change = change_slice_anisotropy_direction_z
slider_slice_coat_strength.on_change = change_slice_coat_strength
slider_slice_coat_roughness.on_change = change_slice_coat_roughness
slider_slice_base_ior.on_change = change_slice_base_ior
slider_slice_coat_ior.on_change = change_slice_coat_ior
And then add the sliders to the panel.
control_panel.add_element(slider_slice_metallic, (0.44, 0.95))
control_panel.add_element(slider_slice_roughness, (0.44, 0.86))
control_panel.add_element(slider_slice_anisotropy, (0.44, 0.77))
control_panel.add_element(slider_slice_anisotropy_rotation, (0.44, 0.68))
control_panel.add_element(slider_slice_anisotropy_direction_x, (0.44, 0.59))
control_panel.add_element(slider_slice_anisotropy_direction_y, (0.44, 0.5))
control_panel.add_element(slider_slice_anisotropy_direction_z, (0.44, 0.41))
control_panel.add_element(slider_slice_coat_strength, (0.44, 0.32))
control_panel.add_element(slider_slice_coat_roughness, (0.44, 0.23))
control_panel.add_element(slider_slice_base_ior, (0.44, 0.14))
control_panel.add_element(slider_slice_coat_ior, (0.44, 0.05))
Consequently, we add the panel to the scene.
scene.add(control_panel)
Previously we defined a function to help us when we resize the window, so let’s capture the current size and add our helper function as a window_callback to the window.
size = scene.GetSize()

show_m.add_window_callback(win_callback)
Finally, let’s visualize our demo.
interactive = False
if interactive:
    show_m.start()

fury.window.record(scene=scene, size=(1920, 1080), out_path="viz_pbr_interactive.png")
Total running time of the script: (0 minutes 1.031 seconds)