Note
Go to the end to download the full example code
Display Tensor Ellipsoids for DTI using tensor_slicer vs ellipsoid actor#
This tutorial is intended to show two ways of displaying diffusion tensor
ellipsoids for DTI visualization. The first is using the usual
tensor_slicer that allows us to slice many tensors as ellipsoids. The
second is the generic ellipsoid actor that can be used to display different
amount of ellipsoids.
We start by importing the necessary modules:
import itertools

from dipy.io.image import load_nifti
import numpy as np

import fury
Now, we fetch and load the data needed to display the Diffusion Tensor Images.
fury.data.fetch_viz_dmri()
Dataset is already in place. If you want to fetch it again please first remove the folder /Users/skoudoro/.fury/dmri

({'fodf.nii.gz': ('https://raw.githubusercontent.com/fury-gl/fury-data/master/dmri/fodf.nii.gz', '767ca3e4cd296e78421d83c32201b30be2d859c332210812140caac1b93d492b'), 'slice_evecs.nii.gz': ('https://raw.githubusercontent.com/fury-gl/fury-data/master/dmri/slice_evecs.nii.gz', '8843ECF3224CB8E3315B7251D1E303409A17D7137D3498A8833853C4603C6CC2'), 'slice_evals.nii.gz': ('https://raw.githubusercontent.com/fury-gl/fury-data/master/dmri/slice_evals.nii.gz', '3096B190B1146DD0EADDFECC0B4FBBD901F4933692ADD46A83F637F28B22122D'), 'roi_evecs.nii.gz': ('https://raw.githubusercontent.com/fury-gl/fury-data/master/dmri/roi_evecs.nii.gz', '89E569858A897E72C852A8F05BBCE0B21C1CA726E55508087A2DA5A38C212A17'), 'roi_evals.nii.gz': ('https://raw.githubusercontent.com/fury-gl/fury-data/master/dmri/roi_evals.nii.gz', 'F53C68CCCABF97F1326E93840A8B5CE2E767D66D692FFD955CA747FFF14EC781'), 'whole_brain_evecs.nii.gz': ('https://raw.githubusercontent.com/fury-gl/fury-data/master/dmri/whole_brain_evecs.nii.gz', '8A894F6AB404240E65451FA6D10FB5D74E2D0BDCB2A56AD6BEA38215BF787248'), 'whole_brain_evals.nii.gz': ('https://raw.githubusercontent.com/fury-gl/fury-data/master/dmri/whole_brain_evals.nii.gz', '47A73BBE68196381ED790F80F48E46AC07B699B506973FFA45A95A33023C7A77')}, '/Users/skoudoro/.fury/dmri')
The tensor ellipsoids are expressed as eigenvalues and eigenvectors which are the decomposition of the diffusion tensor that describes the water diffusion within a voxel.
slice_evecs, _ = load_nifti(fury.data.read_viz_dmri("slice_evecs.nii.gz"))
slice_evals, _ = load_nifti(fury.data.read_viz_dmri("slice_evals.nii.gz"))
roi_evecs, _ = load_nifti(fury.data.read_viz_dmri("roi_evecs.nii.gz"))
roi_evals, _ = load_nifti(fury.data.read_viz_dmri("roi_evals.nii.gz"))
whole_brain_evecs, _ = load_nifti(fury.data.read_viz_dmri("whole_brain_evecs.nii.gz"))
whole_brain_evals, _ = load_nifti(fury.data.read_viz_dmri("whole_brain_evals.nii.gz"))
Using tensor_slicer actor#
First we must define the 3 parameters needed to use the tensor_slicer
actor, which correspond to the eigenvalues, the eigenvectors, and the sphere.
For the sphere we use prim_sphere which provide vertices and triangles of
the spheres. These are labeled as ‘repulsionN’ with N been the number of
vertices that made up the sphere, which have a standard number of 100, 200,
and 724 vertices.
As we need to provide a sphere object we create a class Sphere to which we assign the values obtained from vertices and faces.
Now we are ready to create the tensor_slicer actor with the values of a
brain slice. We also define the scale so that the tensors are not so large
and overlap each other.
tensor_slice = fury.actor.tensor_slicer(
    evals=slice_evals, evecs=slice_evecs, sphere=sphere100, scale=0.3
)
Next, we set up a new scene to add and visualize the tensor ellipsoids created.
scene = fury.window.Scene()
scene.background([255, 255, 255])
scene.add(tensor_slice)

# Create show manager
showm = fury.window.ShowManager(scene=scene, size=(600, 600))

# Enables/disables interactive visualization
interactive = False

if interactive:
    showm.start()

fury.window.record(scene=showm.scene, size=(600, 600), out_path="tensor_slice_100.png")
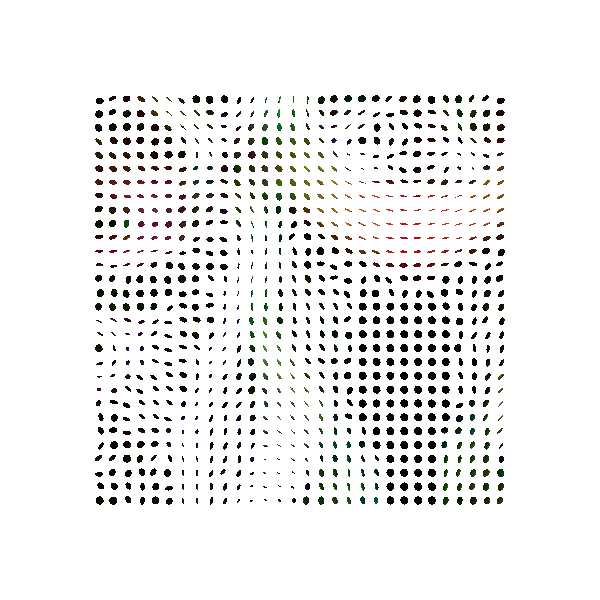
If we zoom in at the scene to see with detail the tensor ellipsoids displayed with the different spheres, we get the following results.
scene.roll(10)
scene.pitch(90)
showm = fury.window.ShowManager(scene=scene, size=(600, 600), order_transparent=True)
showm.scene.zoom(50)

if interactive:
    showm.render()
    showm.start()

fury.window.record(
    scene=showm.scene,
    out_path="tensor_slice_100_zoom.png",
    size=(600, 300),
    reset_camera=False,
)
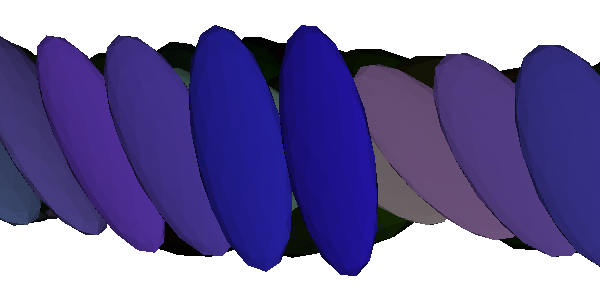
To render the same tensor slice using a different sphere we redefine the vertices and faces of the sphere using prim_sphere with other sphere specification, as ‘repulsion200’ or ‘repulsion724’.
Now we clear the scene for the next visualization, and revert the scene rotations.
showm.scene.clear()
showm.scene.pitch(-90)
showm.scene.roll(-10)
Using ellipsoid actor#
In order to use the ellipsoid actor to display the same tensor slice we
need to set additional parameters. For this purpose, we define a helper
function to facilitate the correct setting of the parameters before passing
them to the actor.
def get_params(evecs, evals):
    # We define the centers which corresponds to the ellipsoids positions.
    valid_mask = np.abs(evecs).max(axis=(-2, -1)) > 0
    indices = np.nonzero(valid_mask)
    centers = np.asarray(indices).T

    # We need to pass the data of the axes and lengths of the ellipsoid as a
    # ndarray, so it is necessary to rearrange the data of the eigenvectors and
    # eigenvalues.
    fevecs = evecs[indices]
    fevals = evals[indices]

    # We need to define the colors of the ellipsoids following the default
    # coloring in tensor_slicer that is uses _color_fa that is a way to map
    # colors to each tensor based on the fractional anisotropy (FA) of each
    # diffusion tensor.
    colors = fury.actor._color_fa(fury.actor._fa(fevals), fevecs)

    return centers, fevecs, fevals, colors
With this we now have the values we need to define the centers, axes, lengths, and colors of the ellipsoids.
centers, evecs, evals, colors = get_params(slice_evecs, slice_evals)
Now, we can use the ellipsoid actor to create the tensor ellipsoids as
follows.
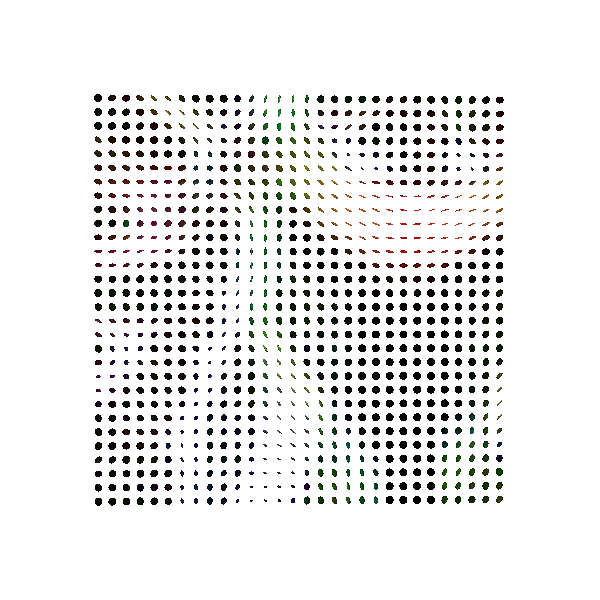
Thus, one can see that the same result is obtained, however there is a
difference in the visual quality and this is because the ellipsoid actor
uses raymarching technique, so the objects that are generated are smoother
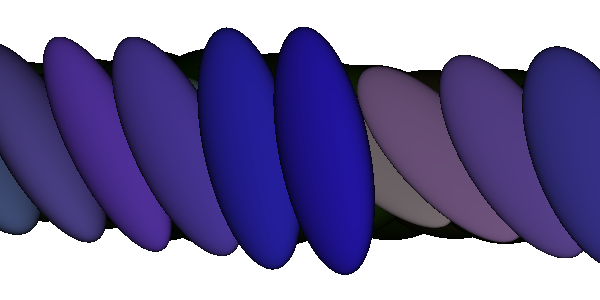
since they are not made with polygons but defined by an SDF function. Next we
can see in more detail the tensor ellipsoids generated.
scene.roll(10)
scene.pitch(90)
showm = fury.window.ShowManager(scene=scene, size=(600, 600), order_transparent=True)
showm.scene.zoom(50)

if interactive:
    showm.render()
    showm.start()

fury.window.record(
    scene=showm.scene,
    out_path="tensor_slice_sdf_zoom.png",
    size=(600, 300),
    reset_camera=False,
)

showm.scene.clear()
showm.scene.pitch(-90)
showm.scene.roll(-10)
Visual quality comparison#
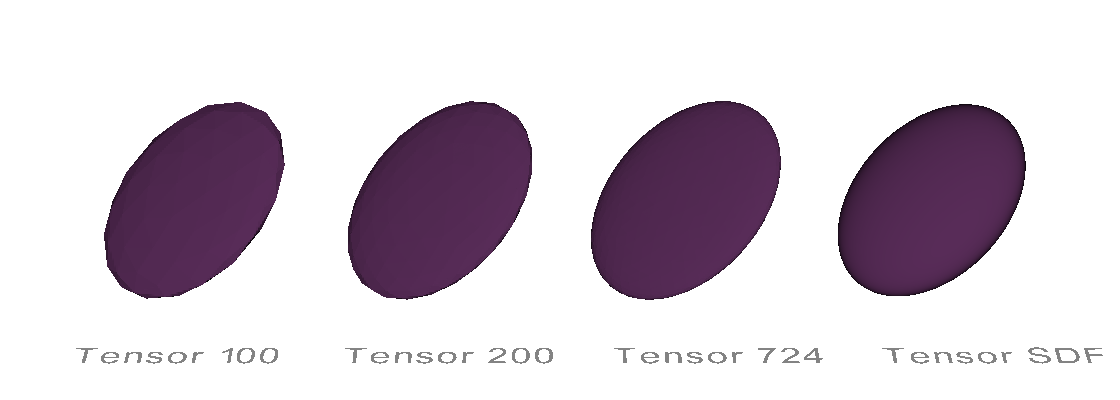
One can see that there is a different on the visual quality of both ways of
displaying tensors and this is because tensor_slicer uses polygons while
ellipsoid uses raymarching. Let’s display both implementations at the
same time, so we can see this in more detail.
We first set up the required data and create the actors.
mevals = np.array([1.4, 1.0, 0.35]) * 10 ** (-3)
mevecs = np.array(
    [[2 / 3, -2 / 3, 1 / 3], [1 / 3, 2 / 3, 2 / 3], [2 / 3, 1 / 3, -2 / 3]]
)

evals = np.zeros((1, 1, 1, 3))
evecs = np.zeros((1, 1, 1, 3, 3))

evals[..., :] = mevals
evecs[..., :, :] = mevecs

vertices, faces = fury.prim_sphere(name="repulsion200", gen_faces=True)
sphere200 = Sphere(vertices, faces)
vertices, faces = fury.prim_sphere(name="repulsion724", gen_faces=True)
sphere724 = Sphere(vertices, faces)

tensor_100 = fury.actor.tensor_slicer(
    evals=evals, evecs=evecs, sphere=sphere100, scale=1.0
)
tensor_200 = fury.actor.tensor_slicer(
    evals=evals, evecs=evecs, sphere=sphere200, scale=1.0
)
tensor_724 = fury.actor.tensor_slicer(
    evals=evals, evecs=evecs, sphere=sphere724, scale=1.0
)

centers, evecs, evals, colors = get_params(evecs=evecs, evals=evals)
tensor_sdf = fury.actor.ellipsoid(
    centers=centers, axes=evecs, lengths=evals, colors=colors, scales=2.0
)
Next, we made use of GridUI which allows us to add the actors in a grid and interact with them individually.
objects = [tensor_100, tensor_200, tensor_724, tensor_sdf]
text = [
    fury.actor.vector_text(text="Tensor 100"),
    fury.actor.vector_text(text="Tensor 200"),
    fury.actor.vector_text(text="Tensor 724"),
    fury.actor.vector_text(text="Tensor SDF"),
]

grid_ui = fury.ui.GridUI(
    actors=objects,
    captions=text,
    cell_padding=0.1,
    caption_offset=(-0.7, -2.5, 0),
    dim=(1, 4),
)

scene = fury.window.Scene()
scene.background([255, 255, 255])
scene.zoom(3.5)
scene.set_camera(position=(3.2, -20, 12), focal_point=(3.2, 0.0, 0.0))
showm = fury.window.ShowManager(scene=scene, size=(560, 200))
showm.scene.add(grid_ui)

if interactive:
    showm.start()

fury.window.record(
    scene=showm.scene,
    size=(560, 200),
    out_path="tensor_comparison.png",
    reset_camera=False,
    magnification=2,
)

showm.scene.clear()
Visualize a larger amount of data#
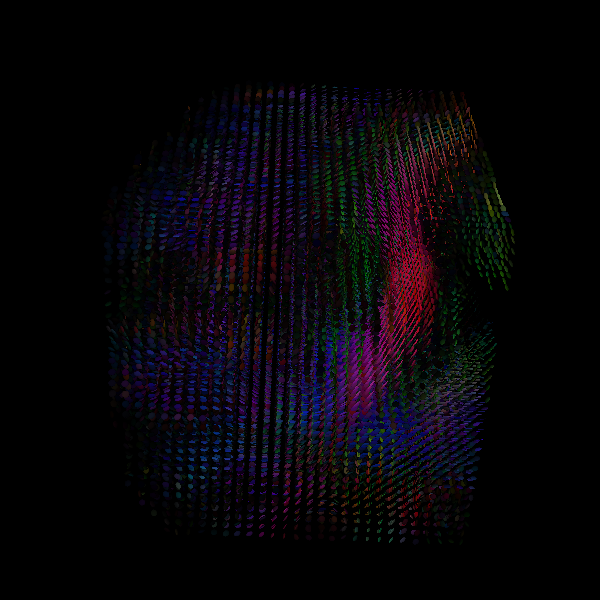
With tensor_slicer is possible to visualize more than one slice using
display_extent(). Here we can see an example of a region of interest
(ROI) using a sphere of 100 vertices.
tensor_roi = fury.actor.tensor_slicer(
    evals=roi_evals, evecs=roi_evecs, sphere=sphere100, scale=0.3
)

data_shape = roi_evals.shape[:3]
tensor_roi.display_extent(0, data_shape[0], 0, data_shape[1], 0, data_shape[2])

showm.size = (600, 600)
showm.scene.background([0, 0, 0])
showm.scene.add(tensor_roi)
showm.scene.azimuth(87)

if interactive:
    showm.start()

fury.window.record(scene=showm.scene, size=(600, 600), out_path="tensor_roi_100.png")

showm.scene.clear()
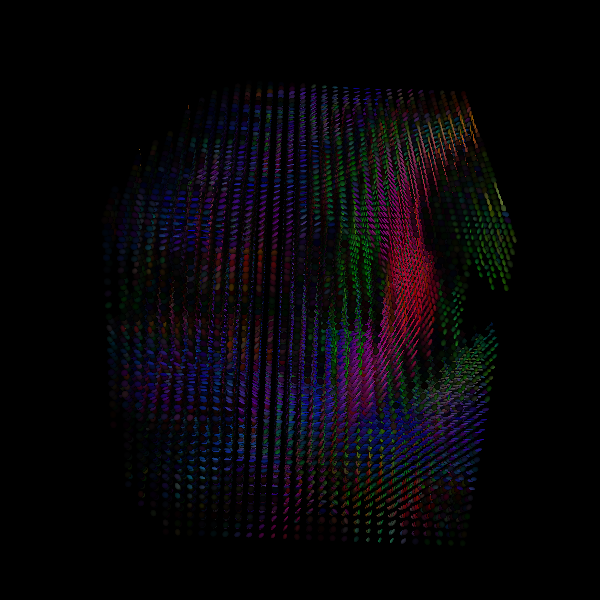
We can do it also with a sphere of 200 vertices, but if we try to do it with
one of 724 the visualization can no longer be rendered. In contrast, we can
visualize the ROI with the ellipsoid actor without compromising the
quality of the visualization.
centers, evecs, evals, colors = get_params(roi_evecs, roi_evals)

tensors = fury.actor.ellipsoid(
    centers=centers, colors=colors, axes=evecs, lengths=evals, scales=0.6
)
showm.scene.add(tensors)

if interactive:
    showm.start()

fury.window.record(scene=showm.scene, size=(600, 600), out_path="tensor_roi_sdf.png")

showm.scene.clear()
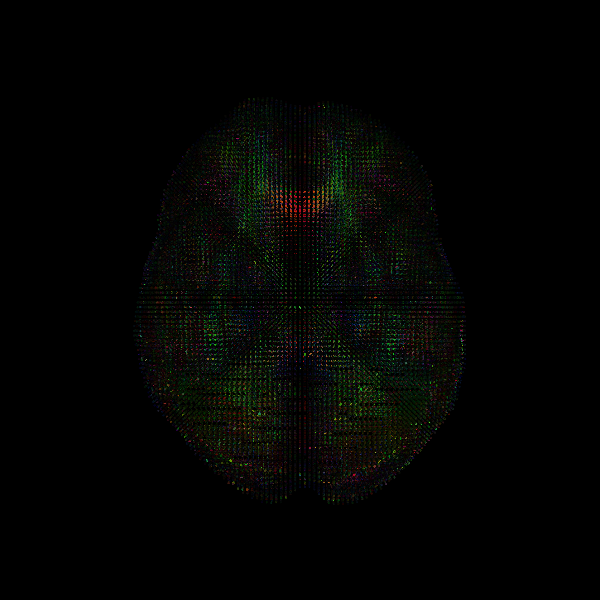
In fact, although with a low performance, this actor allows us to visualize the whole brain, which contains a much larger amount of data, to be exact 184512 tensor ellipsoids are displayed at the same time.
centers, evecs, evals, colors = get_params(whole_brain_evecs, whole_brain_evals)

# We remove all the noise around the brain to have a better visualization.
fil = [len(set(elem)) != 1 for elem in evals]
centers = np.array(list(itertools.compress(centers, fil)))
colors = np.array(list(itertools.compress(colors, fil)))
evecs = np.array(list(itertools.compress(evecs, fil)))
evals = np.array(list(itertools.compress(evals, fil)))

tensors = fury.actor.ellipsoid(
    centers=centers, colors=colors, axes=evecs, lengths=evals, scales=0.6
)

scene = fury.window.Scene()
scene.add(tensors)
scene.pitch(180)
showm = fury.window.ShowManager(scene=scene, size=(600, 600))

if interactive:
    showm.start()

fury.window.record(
    scene=showm.scene,
    size=(600, 600),
    reset_camera=False,
    out_path="tensor_whole_brain_sdf.png",
)

showm.scene.clear()
Total running time of the script: (0 minutes 8.572 seconds)
