FURY - pyBullet Integration Guide#
Note
All elements are in SI units.
Simple Rigid Body Dynamics#
Necessary Imports#
The following imports are necessary for physics simulations:
Imports |
Usage |
|---|---|
Numpy |
Creation of arrays and conversion of radians to degrees. |
FURY |
Window and Actor API is used to visualize the simulation. |
pyBullet |
Physics simulation. |
Itertools |
The Counter iterator for keeping track of simulation steps. |
import numpy as np
from fury import window, actor
import itertools
import pybullet as p
Connection Mode#
“After importing the PyBullet module, the first thing to do is ‘connecting’ to the physics simulation. PyBullet is designed around a client-server driven API, with a client sending commands and a physics server returning the status. PyBullet has some built-in physics servers: DIRECT and GUI.”
In our case we use DIRECT connection as the visualization will be handled by FURY.
client = p.connect(p.DIRECT)
Note
Keeping track of physics client ID is optional unless multiple physics clients are used. In order to observe the same simulation in pybullet, replace p.DIRECT with p.GUI.
Disconnection#
PyBullet Physics client can be shutdown by the following command:
p.disconnect()
Setting Gravity#
Global Scene() gravity can be set using the following command:
# Gravity vector.
gravity_x = 0
gravity_y = 0
gravity_z = -10
p.setGravity(gravity_x, gravity_y, gravity_z)
Creating Objects#
The following criterion must be fulfilled in order to create an object which is in sync with both FURY and pyBullet:
Object Actor |
The actor which will be rendered by FURY |
Collision Shape |
The shape used by pybullet for collision simulations. Optional if collision simulation is not required. |
Multi-Body |
The object that will be tracked by pybullet for general simulations. |
The following is a snippet for creating a spherical ball of radius = 0.3
###### Creating BALL
# Ball actor
ball_actor = actor.sphere(centers = np.array([[0, 0, 0]]),
                          colors=np.array([1,0,0]),
                          radii=0.3)

# Collision shape for the ball.
ball_coll = p.createCollisionShape(p.GEOM_SPHERE,
                                   radius=0.3)

# Creating a Multibody which will be tracked by pybullet.
ball = p.createMultiBody(baseMass=3,
                         baseCollisionShapeIndex=ball_coll,
                         basePosition=[2, 0, 1.5],
                         baseOrientation=[ 0, 0, 0, 1 ])
Warning
Centers for the actor must be set to (0, 0, 0) or else the simulation will be offset by that particular value.
Changing Object Dynamics#
Object dynamics such as mass, lateral_friction, damping, inertial_pos, inertial_orn, restitution, rolling friction etc can be changed. The following snippet shows how to change the lateral_friction and coeff of restitution of the same ball:
p.changeDynamics(ball, -1, lateralFriction=0.3, restitution=0.5)
Note
The second parameter is linkIndex which is for bodies having multiple links or joints. Passing -1 means applying changes to the base object.
Adding objects to the scene#
Objects can be added simply by adding their respective actors to the scene.
scene = window.Scene()
scene.add(ball_actor)
Application of Force/Torque#
External force or torque to a body can be applied using applyExternalForce and applyExternalTorque. For e.g
p.applyExternalForce(ball, -1,
                     forceObj=[-2000, 0, 0],
                     posObj=ball_pos,
                     flags=p.WORLD_FRAME)
Here, the first argument refers to the object, the second one refers to the link, forceObj = force vector, posObj = Position Vector of the application of force. [Not applicable for applyExternalTorque].
p.applyExternalTorque(ball, -1,
                     forceObj=[-2000, 0, 0],
                     flags=p.WORLD_FRAME)
Enabling collision#
By default, collision detection is enabled between different dynamic moving bodies. The following snippet can be used to enable/disable collision explicitly between a pair of objects.
enableCol = 1
p.setCollisionFilterPair(ball, brick, -1, -1, enableCol)
Here, we enable the collision between a ball and a brick object.
Creation of Show Manager#
A window.ShowManager and itertools.count instance must be created before defining the timer callback function and setting it to initialize.
# Create a show manager.
showm = window.ShowManager(scene,
                        size=(900, 768), reset_camera=False,
                        order_transparent=True)
showm.initialize()
# Counter iterator for tracking simulation steps.
counter = itertools.count()
Syncing properties of actors#
The position and orientation of the actors in FURY can be updated by the values generated in pybullet during simulation. The following snippet updates all required parameters.
# Get the position and orientation of the ball.
ball_pos, ball_orn = p.getBasePositionAndOrientation(ball)

# Set position and orientation of the ball.
ball_actor.SetPosition(*ball_pos)
orn_deg = np.degrees(p.getEulerFromQuaternion(ball_orn))
ball_actor.SetOrientation(*orn_deg)
ball and ball_actor can be replaced by the appropriate object and actor.
Creation of Timer Callback#
To simulate physics we need to call p.stepSimulation() in order to simulate a single step of physics simulation. Therefore, in order to update actors and simulate steps at each interval, we need to create a timer callback. At this point one can perform any operation that they feel like during each step of the simulation. This is also the appropriate section for the user to define all syncing activities required by the actors and render the scene accordingly. The following can be an example snippet:
# Counter iterator for tracking simulation steps.
counter = itertools.count()

# Variable for tracking applied force.
apply_force = True

# Create a timer callback which will execute at each step of simulation.
def timer_callback(_obj, _event):
    global apply_force
    cnt = next(counter)
    showm.render()
    # Get the position and orientation of the ball.
    ball_pos, ball_orn = p.getBasePositionAndOrientation(ball)

    # Apply force for 5 times for the first step of simulation.
    if apply_force:
        # Apply the force.
        p.applyExternalForce(ball, -1,
                              forceObj=[-2000, 0, 0],
                              posObj=ball_pos,
                              flags=p.WORLD_FRAME)
        apply_force = False

    # Set position and orientation of the ball.
    ball_actor.SetPosition(*ball_pos)
    orn_deg = np.degrees(p.getEulerFromQuaternion(ball_orn))
    ball_actor.SetOrientation(*orn_deg)
    ball_actor.RotateWXYZ(*ball_orn)

    # Simulate a step.
    p.stepSimulation()

    # Exit after 2000 steps of simulation.
    if cnt == 2000:
        showm.exit()

# Add the timer callback to showmanager.
# Increasing the duration value will slow down the simulation.
showm.add_timer_callback(True, 10, timer_callback)
Initiating the simulation#
Once everything is set up, one can execute showm.start() to start the simulation.
Rendering multiple objects by a single actor#
Rendering multiple similar objects by a single actor is possible by manually updating the vertices of the individual objects. The said procedure will be demonstrated with the help of the brick wall simulation example where each brick is rendered by a single actor. Firstly, we need to define the following parameters:
Variable |
Shape |
Description |
|---|---|---|
nb_objects |
1, 1 |
Number of objects to be rendered |
object_centers |
nb_objects, 3 |
To keep track of the centers in the xyz coordinate system. [x, y, z] |
object_directions |
nb_objects, 3 |
Array to track directions. |
object_orientations |
nb_objects, 4 |
Array to track orientations in quaternions. [x, y, z, w] |
object_colors |
nb_bricks, 3 |
Array to track colors. |
object_collision |
1, 1 |
Collision shape of the objects. |
Warning
object_directions & object_orientations must be updated together or else orientation of objects in both the worlds may not be in sync.
Once we are ready with the above variables and array, we can proceed further to render the objects both in the FURY and pybullet world:
Rendering objects in FURY#
To render objects in the FURY world we simply call the respective actors. For this example we call actor.box for rendering the bricks:
brick_actor_single = actor.box(centers=brick_centers,
                            directions=brick_directions,
                            scales=brick_sizes,
                            colors=brick_colors)

scene.add(brick_actor_single)
Render Pybullet Objects#
Now to render pybullet objects we simply create a list of multibodies:
bricks[i] = p.createMultiBody(baseMass=0.5,
                              baseCollisionShapeIndex=brick_coll,
                              basePosition=center_pos,
                              baseOrientation=brick_orn)
Syncing objects#
Now in order to calculate and the vertices we execute the following snippet:
vertices = utils.vertices_from_actor(brick_actor_single)
num_vertices = vertices.shape[0]
num_objects = brick_centers.shape[0]
sec = int(num_vertices / num_objects)
Vertices |
Array storing vertices of all the objects. |
|---|---|
num_vertices |
Number of vertices required to render the objects. |
num_objects |
Number of objects rendered |
sec |
Number of vertices required to render a single object. |
Now the pybullet and FURY objects can be synced together by the following snippet:
def sync_brick(object_index, multibody):
  pos, orn = p.getBasePositionAndOrientation(multibody)

  rot_mat = np.reshape(
      p.getMatrixFromQuaternion(
          p.getDifferenceQuaternion(orn, brick_orns[object_index])),
      (3, 3))

  vertices[object_index * sec: object_index * sec + sec] = \
      (vertices[object_index * sec: object_index * sec + sec] -
      brick_centers[object_index])@rot_mat + pos

  brick_centers[object_index] = pos
  brick_orns[object_index] = orn
In order to Sync correctly, we do the following:
First we get the current position and orientation of the objects in the pybullet world with the help of
p.getBasePositionAndOrientation.Then we calculate the difference between two quaternions using
p.getDifferenceFromQuarternion.The said difference is then passed to
p.getMatrixFromQuaternionto calculate the rotation matrix.Now the method returns a tuple of size 9. Therefore we finally need to reshape the said tuple into a 3x3 matrix with the help of
np.reshape.Next, we slice the necessary part of the vertices which render our desired object.
Then we bring it back to the origin by subtracting their centers.
After that we perform matrix multiplication of the rotation matrix and the vertices to orient the object.
After orientation we bring the object to its new position.
Finally we update the centers and the orientation of the object.
Lastly, we call this function in our timer callback to sync the objects correctly.
Note
VTK has an in-built method to handle gimbal locks therefore using actor.SetOrientation may lead to unwanted spinning simulations each time a gimbal lock is experienced. Hence, it is always advisable to use vertices and its corresponding rotation matrix to set the orientation.
Rendering Joints#

A simulated robot as described in a URDF file has a base, and optionally links connected by joints. Each joint connects one parent link to a child link. At the root of the hierarchy there is a single root parent that we call base. The base can be either fully fixed, 0 degrees of freedom, or fully free, with 6 degrees of freedom. Since each link is connected to a parent with a single joint, the number of joints is equal to the number of links. Regular links have link indices in the range [0..getNumJoints()] Since the base is not a regular ‘link’, we use the convention of -1 as its link index. We use the convention that joint frames are expressed relative to the parent center of mass inertial frame, which is aligned with the principal axis of inertia. To know more how joints are implemented in pybullet refer the official docs.
We can create and sync joints in pybullet and FURY by following a few simple steps:
Firstly, in order to create objects with multiple joints we need to keep track of the following parameters:
Vertices |
Shape |
Description |
|---|---|---|
nb_links |
1,1 |
Number of links to be rendered. |
link_masses |
nb_links |
Masses of the links. |
linkCollisionShapeIndices |
nb_links |
Array tracking the collision shape IDs. |
linkVisualShapeIndices |
nb_links |
Optional as we won’t be using pybullet’s GUI render. |
linkPositions |
nb_links, 3 |
Position of the links in [x, y, z]. |
linkOrientations |
nb_links, 4 |
Orientation of the links in [x, y, z, w]. |
linkInertialFramePositions |
nb_links, 3 |
Position of the inertial frame of the links. |
linkInertialFrameOrns |
nb_links, 4 |
Orientation of the inertial frame of the links. |
indices |
nb_link |
Link ID each corresponding link is supposed to attach at. |
jointTypes |
nb_link |
The type of joint between the links. Multiple joint types are available. |
axis |
nb_links, 3 |
The axis at which each link is supposed to rotate. |
linkDirections |
nb_links, 3 |
Direction vector required to render links in FURY. |
Extra Arrays such as linkHeights, linkRadii etc may be required based on the link shape.
Base link is rendered separately, hence the above parameters should not contain information about the base link.
Now separately create definitions for the base link using the following parameters. Once we are ready with the required link parameters and definition, we can create a multibody to be rendered in the pybullet world. We can do so using p.createMultiBody. Here’s a snippet:
rope = p.createMultiBody(base_mass,
                         base_shape,
                         visualShapeId,
                         basePosition,
                         baseOrientation,
                         linkMasses=link_Masses,
                        linkCollisionShapeIndices=linkCollisionShapeIndices,
                         linkVisualShapeIndices=linkVisualShapeIndices,
                         linkPositions=linkPositions,
                         linkOrientations=linkOrientations,
                        linkInertialFramePositions=linkInertialFramePositions,
                          linkInertialFrameOrientations=linkInertialFrameOrns,
                         linkParentIndices=indices,
                         linkJointTypes=jointTypes,
                         linkJointAxis=axis)
Once we are done with the multibody we can create the actor to render the links:
rope_actor = actor.cylinder(centers=linkPositions,
                      directions=linkDirections,
                      colors=np.random.rand(n_links, 3),
                      radius=radii,
                      heights=link_heights, capped=True)
We can sync the joints using the following code snippet:
def sync_joints(actor_list, multibody):
  for joint in range(p.getNumJoints(multibody)):
      pos, orn = p.getLinkState(multibody, joint)[4:6]

      rot_mat = np.reshape(
              p.getMatrixFromQuaternion(
              p.getDifferenceQuaternion(orn, linkOrientations[joint])),
              (3, 3))

      vertices[joint * sec: joint * sec + sec] =\
              (vertices[joint * sec: joint * sec + sec] -
              linkPositions[joint])@rot_mat + pos

      linkPositions[joint] = pos
      linkOrientations[joint] = orn
Here, we determine the total number of joints using p.getNumJoints and run a loop to iterate through all the joints present within the object. Once we get access to a particular joint we use the p.getLinkState to get various information about a particular joint. Within the list of information we have access to positions and orientation of the joints at index 4 and 5. So we perform the query to get the position and orientation of the joints. After that the process of translation and rotation are the same as shown here.
Examples#
Brick Wall Simulation#
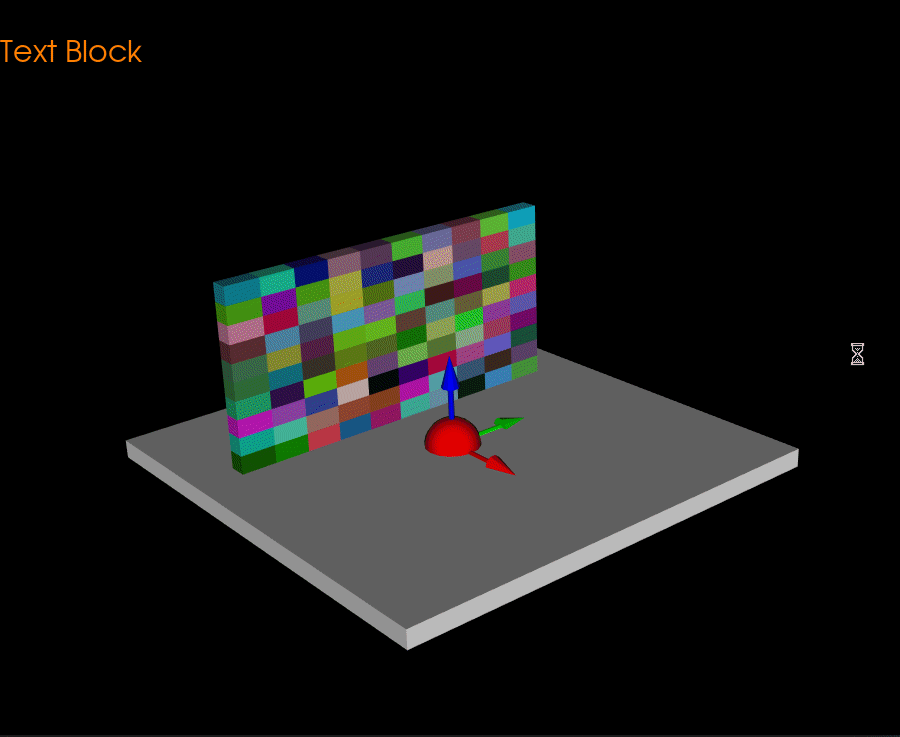
The code for the above simulation can be found here.
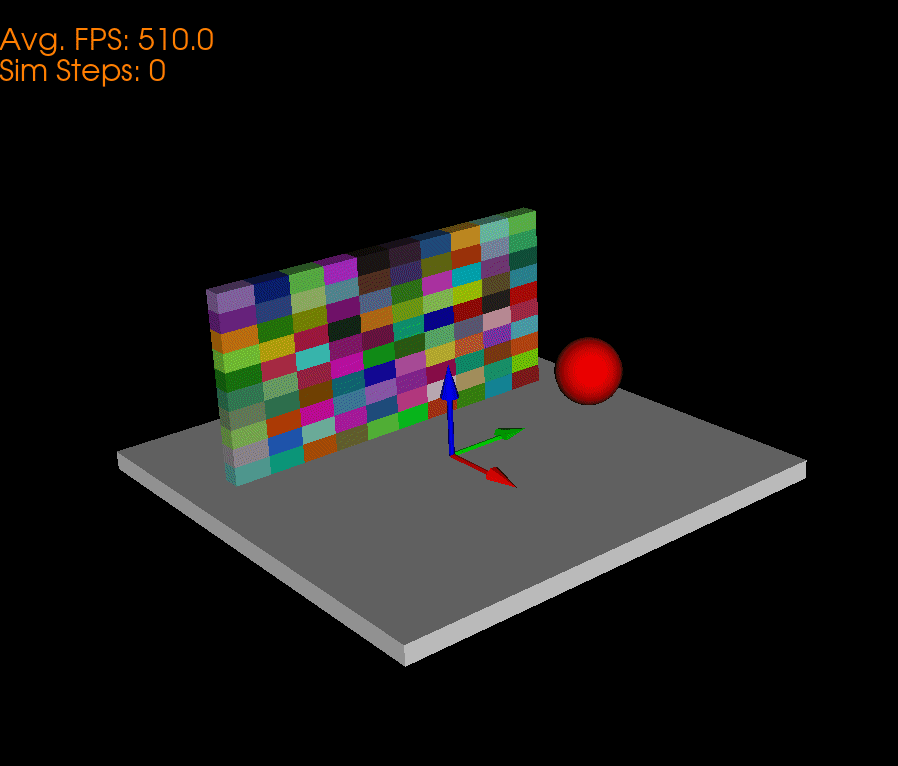
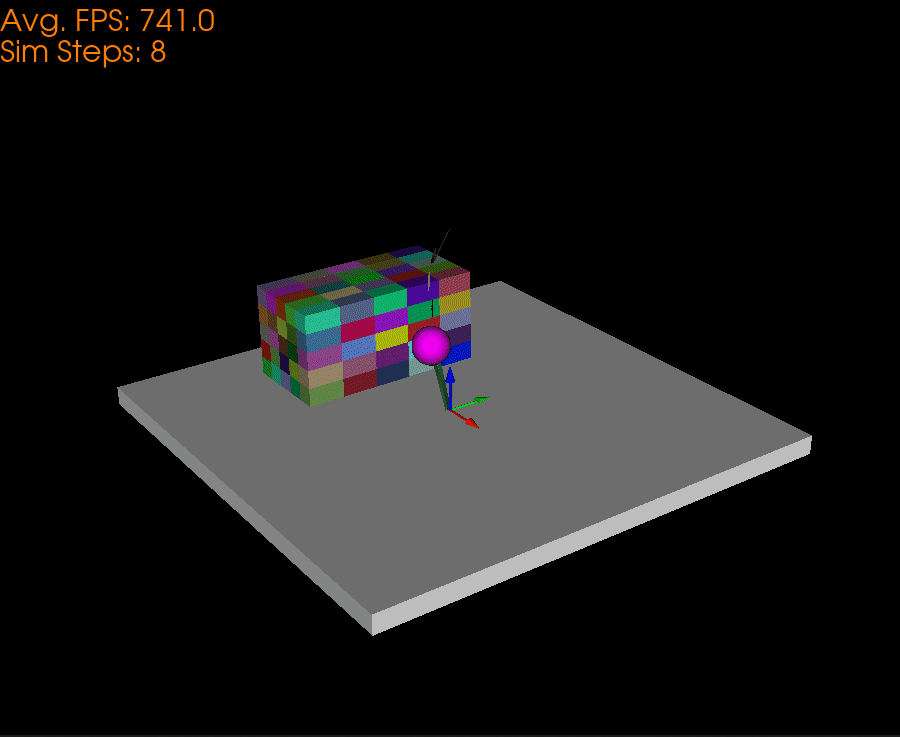
Ball Collision Simulation#
The code for the above simulation can be found here.
Brick Wall Simulation(Single Actor)#
The code for the above simulation can be found here.
Chain Simulation#
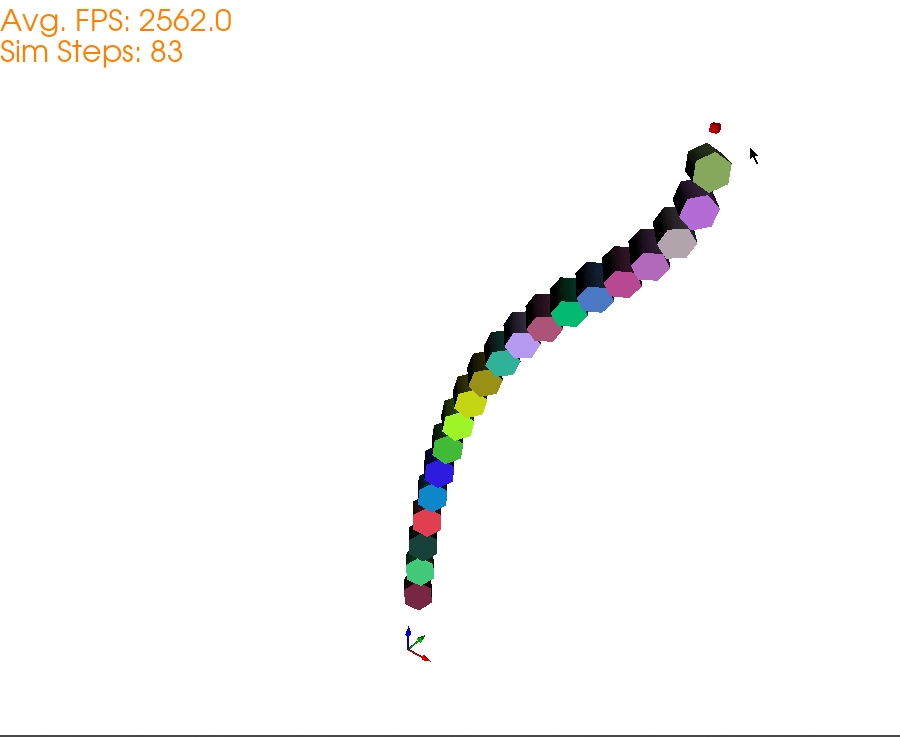
The code for the above simulation can be found here.
Wrecking Ball Simulation#
The code for the above simulation can be found here.
Domino Simulation#
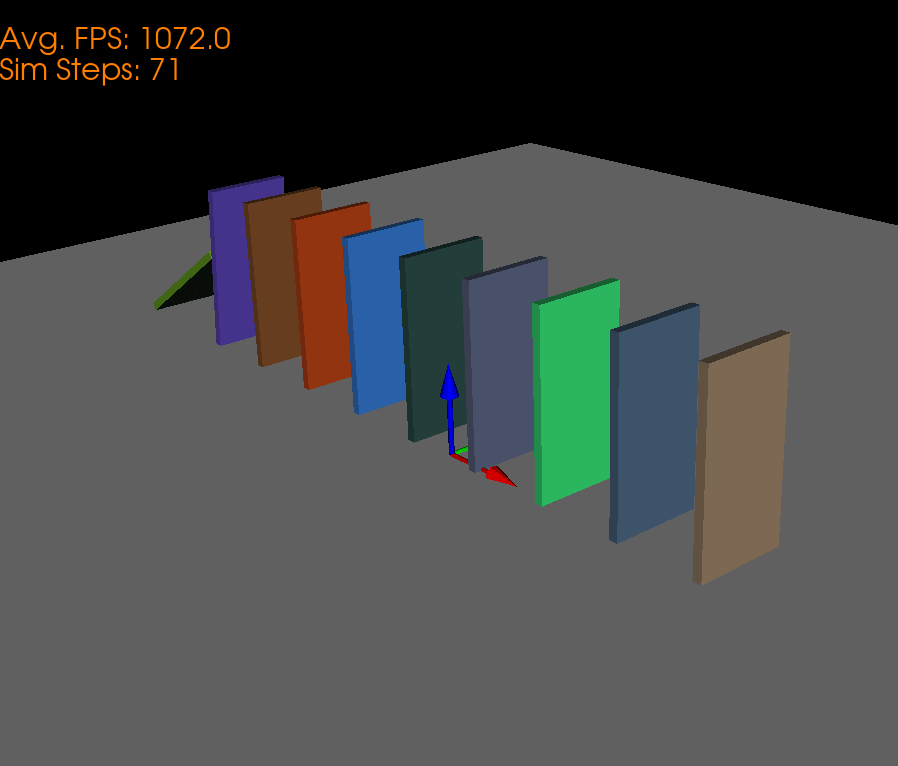
The code for the above simulation can be found here.