Note
Click here to download the full example code
Cube & Slider Control
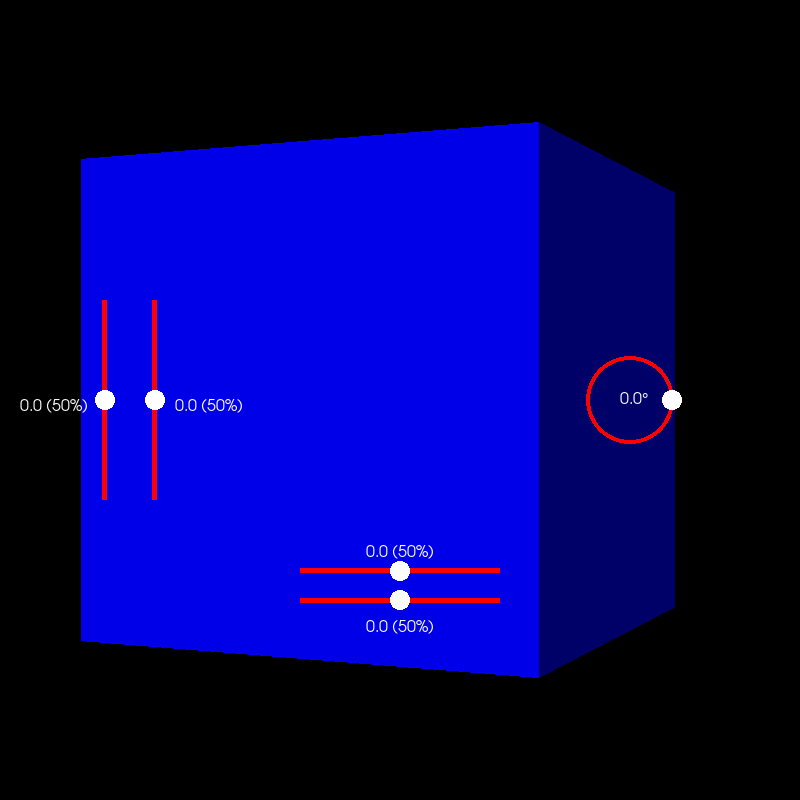
This example shows how to use the UI API. We will demonstrate how to create a cube and control with sliders.
First, some imports.
from fury import ui, window, actor
from fury.data import fetch_viz_icons
import numpy as np
First we need to fetch some icons that are included in FURY.
Out:
Data size is approximately 12KB
Dataset is already in place. If you want to fetch it again please first remove the folder /Users/koudoro/.fury/icons
Cube and sliders
Add a cube to the scene .
cube = actor.cube(centers=np.array([[15, 0, 0]]),
                  colors=np.array([[0, 0, 1]]),
                  scales=np.array([[20, 20, 20]]),
                  directions=np.array([[0, 0, 1]]))
Now we’ll add five sliders: 1 circular and 4 linear sliders. By default the alignments are ‘bottom’ for horizontal and ‘top’ for vertical.
ring_slider = ui.RingSlider2D(center=(630, 400), initial_value=0,
                              text_template="{angle:5.1f}°")

hor_line_slider_text_top = ui.LineSlider2D(center=(400, 230), initial_value=0,
                                           orientation='horizontal',
                                           min_value=-10, max_value=10,
                                           text_alignment='top')

hor_line_slider_text_bottom = ui.LineSlider2D(center=(400, 200),
                                              initial_value=0,
                                              orientation='horizontal',
                                              min_value=-10, max_value=10,
                                              text_alignment='bottom')

ver_line_slider_text_left = ui.LineSlider2D(center=(100, 400), initial_value=0,
                                            orientation='vertical',
                                            min_value=-10, max_value=10,
                                            text_alignment='left')

ver_line_slider_text_right = ui.LineSlider2D(center=(150, 400),
                                             initial_value=0,
                                             orientation='vertical',
                                             min_value=-10, max_value=10,
                                             text_alignment='right')
We can use a callback to rotate the cube with the ring slider.
def rotate_cube(slider):
    angle = slider.value
    previous_angle = slider.previous_value
    rotation_angle = angle - previous_angle
    cube.RotateX(rotation_angle)


ring_slider.on_change = rotate_cube
Similarly, we can translate the cube with the line slider.
def translate_cube(slider):
    value = slider.value
    cube.SetPosition(value, 0, 0)


hor_line_slider_text_top.on_change = translate_cube
hor_line_slider_text_bottom.on_change = translate_cube
ver_line_slider_text_left.on_change = translate_cube
ver_line_slider_text_right.on_change = translate_cube
Show Manager
Now that all the elements have been initialised, we add them to the show manager.
current_size = (800, 800)
show_manager = window.ShowManager(size=current_size, title="FURY Cube Example")

show_manager.scene.add(cube)
show_manager.scene.add(ring_slider)
show_manager.scene.add(hor_line_slider_text_top)
show_manager.scene.add(hor_line_slider_text_bottom)
show_manager.scene.add(ver_line_slider_text_left)
show_manager.scene.add(ver_line_slider_text_right)
Visibility by default is True
cube.SetVisibility(True)
ring_slider.set_visibility(True)
hor_line_slider_text_top.set_visibility(True)
hor_line_slider_text_bottom.set_visibility(True)
ver_line_slider_text_left.set_visibility(True)
ver_line_slider_text_right.set_visibility(True)
Set camera for better visualization
show_manager.scene.reset_camera()
show_manager.scene.set_camera(position=(0, 0, 150))
show_manager.scene.reset_clipping_range()
show_manager.scene.azimuth(30)
interactive = False

if interactive:
    show_manager.start()

window.record(show_manager.scene,
              size=current_size, out_path="viz_slider.png")

Total running time of the script: ( 0 minutes 0.180 seconds)