Note
Click here to download the full example code
Simple volume slicing
Here we present an example for visualizing slices from 3D images.
import os
import nibabel as nib
from dipy.data import fetch_bundles_2_subjects
from fury import window, actor, ui
Let’s download and load a T1.
Create a Scene object which holds all the actors which we want to visualize.
scene = window.Scene()
scene.background((0.5, 0.5, 0.5))
Render slices from T1 with a specific value range
The T1 has usually a higher range of values than what can be visualized in an image. We can set the range that we would like to see.
mean, std = data[data > 0].mean(), data[data > 0].std()
value_range = (mean - 0.5 * std, mean + 1.5 * std)
The slice function will read data and resample the data using an affine
transformation matrix. The default behavior of this function is to show the
middle slice of the last dimension of the resampled data.
The slice_actor contains an axial slice.
scene.add(slice_actor)
The same actor can show any different slice from the given data using its
display function. However, if we want to show multiple slices we need to
copy the actor first.
slice_actor2 = slice_actor.copy()
Now we have a new slice_actor which displays the middle slice of sagittal
plane.
slice_actor2.display(slice_actor2.shape[0]//2, None, None)

scene.add(slice_actor2)

scene.reset_camera()
scene.zoom(1.4)
In order to interact with the data you will need to uncomment the line below.
# window.show(scene, size=(600, 600), reset_camera=False)
Otherwise, you can save a screenshot using the following command.
window.record(scene, out_path='slices.png', size=(600, 600),
              reset_camera=False)

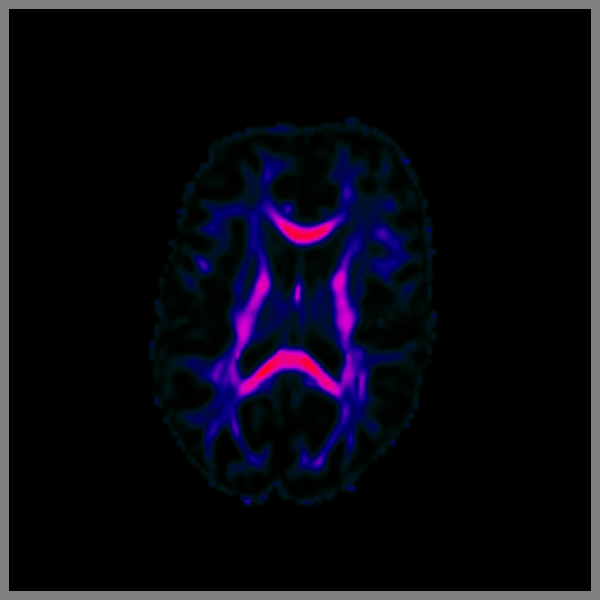
Render slices from FA with your colormap
# It is also possible to set the colormap of your preference. Here we are
# loading an FA image and showing it in a non-standard way using an HSV
# colormap.

fname_fa = os.path.join(os.path.expanduser('~'), '.dipy',
                        'exp_bundles_and_maps', 'bundles_2_subjects',
                        'subj_1', 'fa_1x1x1.nii.gz')

img = nib.load(fname_fa)
fa = img.get_data()
Notice here how the scale range is. We use FA min and max values to set it up
lut = actor.colormap_lookup_table(scale_range=(fa.min(), fa.max()),
                                  hue_range=(0.4, 1.),
                                  saturation_range=(1, 1.),
                                  value_range=(0., 1.))
This is because the lookup table is applied in the slice after interpolating to (0, 255).
Now we would like to add the ability to click on a voxel and show its value
on a panel in the window. The panel is a UI element which requires access to
different areas of the visualization pipeline and therefore we don’t
recommend using it with window.show. The more appropriate way is to use
the ShowManager object, which allows accessing the pipeline in different
areas.
show_m = window.ShowManager(scene, size=(1200, 900))
show_m.initialize()
We’ll start by creating the panel and adding it to the ShowManager
label_position = ui.TextBlock2D(text='Position:')
label_value = ui.TextBlock2D(text='Value:')

result_position = ui.TextBlock2D(text='')
result_value = ui.TextBlock2D(text='')

panel_picking = ui.Panel2D(size=(250, 125),
                           position=(20, 20),
                           color=(0, 0, 0),
                           opacity=0.75,
                           align="left")

panel_picking.add_element(label_position, (0.1, 0.55))
panel_picking.add_element(label_value, (0.1, 0.25))

panel_picking.add_element(result_position, (0.45, 0.55))
panel_picking.add_element(result_value, (0.45, 0.25))

show_m.scene.add(panel_picking)
Add a left-click callback to the slicer. Also disable interpolation so you can see what you are picking.
def left_click_callback(obj, _ev):
    """Get the value of the clicked voxel and show it in the panel."""
    event_pos = show_m.iren.GetEventPosition()

    obj.picker.Pick(event_pos[0],
                    event_pos[1],
                    0,
                    show_m.scene)

    i, j, k = obj.picker.GetPointIJK()
    result_position.message = '({}, {}, {})'.format(str(i), str(j), str(k))
    result_value.message = '%.8f' % data[i, j, k]


fa_actor.SetInterpolate(False)
fa_actor.AddObserver('LeftButtonPressEvent', left_click_callback, 1.0)

# show_m.start()
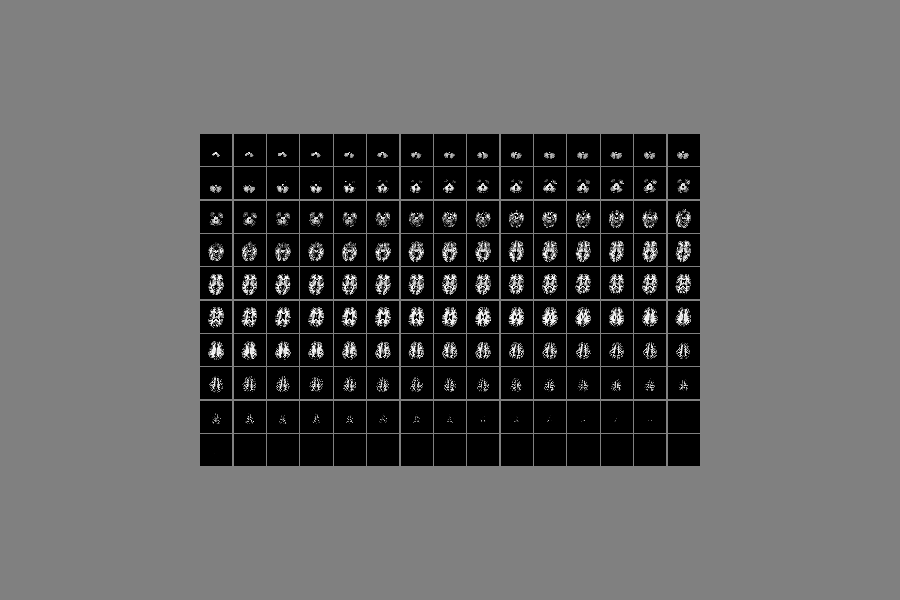
Create a mosaic
By using the copy and display method of the slice_actor becomes
easy and efficient to create a mosaic of all the slices.
So, let’s clear the scene and change the projection from perspective to parallel. We’ll also need a new show manager and an associated callback.
scene.clear()
scene.projection('parallel')

result_position.message = ''
result_value.message = ''

show_m_mosaic = window.ShowManager(scene, size=(1200, 900))
show_m_mosaic.initialize()


def left_click_callback_mosaic(obj, _ev):
    """Get the value of the clicked voxel and show it in the panel."""
    event_pos = show_m_mosaic.iren.GetEventPosition()

    obj.picker.Pick(event_pos[0],
                    event_pos[1],
                    0,
                    show_m_mosaic.scene)

    i, j, k = obj.picker.GetPointIJK()
    result_position.message = '({}, {}, {})'.format(str(i), str(j), str(k))
    result_value.message = '%.8f' % data[i, j, k]
Now we need to create two nested for loops which will set the positions of the grid of the mosaic and add the new actors to the scene. We are going to use 15 columns and 10 rows but you can adjust those with your datasets.
cnt = 0

X, Y, Z = slice_actor.shape[:3]

rows = 10
cols = 15
border = 10

for j in range(rows):
    for i in range(cols):
        slice_mosaic = slice_actor.copy()
        slice_mosaic.display(None, None, cnt)
        slice_mosaic.SetPosition((X + border) * i,
                                 0.5 * cols * (Y + border) - (Y + border) * j,
                                 0)
        slice_mosaic.SetInterpolate(False)
        slice_mosaic.AddObserver('LeftButtonPressEvent',
                                 left_click_callback_mosaic,
                                 1.0)
        scene.add(slice_mosaic)
        cnt += 1
        if cnt > Z:
            break
    if cnt > Z:
        break

scene.reset_camera()
scene.zoom(1.0)

# show_m_mosaic.scene.add(panel_picking)
# show_m_mosaic.start()
If you uncomment the two lines above, you will be able to move the mosaic up/down and left/right using the middle mouse button drag, zoom in/out using the scroll wheel, and pick voxels with left click.
window.record(scene, out_path='mosaic.png', size=(900, 600),
              reset_camera=False)
Total running time of the script: ( 0 minutes 4.285 seconds)